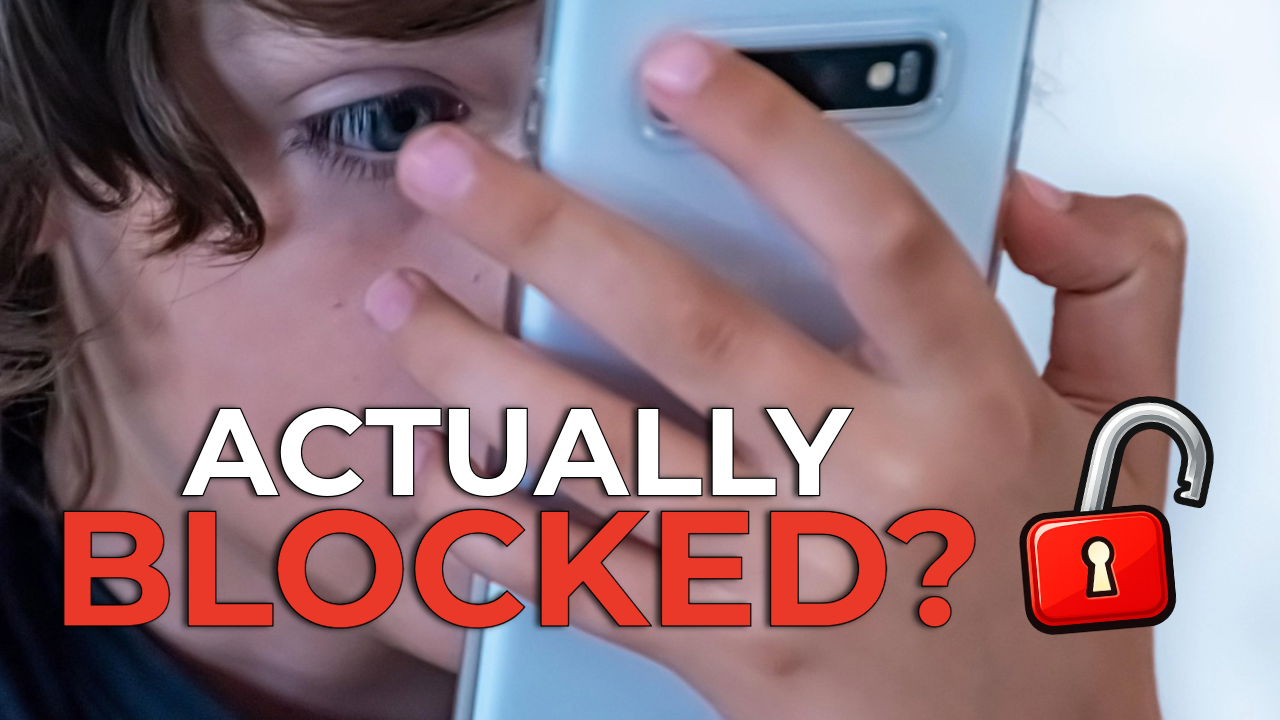
Why online safety matters at home
UniFi parental controls provide a practical way to manage internet access at home, but keeping children safe online is becoming increasingly difficult. Children now access the internet through phones, tablets, laptops, games consoles, and smart TVs, often with very different controls on each device and platform.
Keeping online activity consistent and age-appropriate across all of these devices is a growing challenge for parents.
UniFi parental controls offer a practical, network-level approach. Instead of installing software on every device, you apply rules once at the Wi-Fi level, ensuring consistent behaviour across the entire home.
A practical, real-world approach
This guide focuses on how UniFi parental controls behave in real homes, not how they are described in marketing material.
I’ll start with the simplest and most effective setup, then build up to more advanced options. Along the way, I’ll highlight what works well, what has limitations, and where UniFi needs to be combined with device-level controls.
You don’t need to use every feature covered here. Many households only need a small subset of these tools to achieve a sensible level of protection.
What this guide will cover
Hardware Requirements for UniFi Parental Controls
To follow this guide fully and use all the features covered, you’ll need a complete UniFi system. UniFi parental controls rely on network-level features that are only available when UniFi hardware works together as a system.
At a minimum, you will need:
UniFi Gateway or Cloud Gateway
A UniFi Gateway is essential. This is where:
- Content filtering
- DNS settings
- Traffic rules
- VPN blocking attempts
- Wi-Fi schedules
are all configured and enforced.
Examples include UniFi Cloud Gateways and UniFi Gateway devices.
Affiliate links to suitable gateways are included throughout this article.

Dream MAchine SE
- Gigabit PoE
- 10Gbp Uplink
- HDD Bay


Cloud Gateway Fibre
- 3 x 10Gbp
- 4 x 2.5Gbp
- SSD Bay


Cloud Gateway Ultra
- 2.5Gbp WAN
- LCD Screen
- Multi-WAN
Managed Network Switches (Recommended)
While not strictly required in very small setups, managed switches — ideally UniFi switches — are strongly recommended.
They allow:
- Proper network segmentation
- VLAN handling
- Consistent behaviour across wired and wireless devices
Using non-managed switches can limit what you’re able to do later.
UniFi Wireless Access Points
To apply Wi-Fi-based controls reliably, you’ll need UniFi wireless access points.
These handle:
- Separate SSIDs
- Wi-Fi schedules
- Network isolation
- Consistent enforcement of rules
Mixing UniFi gateways with third-party access points often results in reduced functionality or inconsistent behaviour.
Important: ISP Routers and Mixed Systems
If you’re using:
- An ISP-supplied router
- Consumer mesh systems
- A mixture of different brands
You will not be able to replicate everything in this guide.
Some basic UniFi parental controls may still be possible, but features such as network isolation, traffic rules, and reliable scheduling require a full UniFi environment.
Summary
To get the most out of this guide, you should be running:
- A UniFi Gateway or Cloud Gateway
- UniFi (or managed) network switches
- UniFi wireless access points
This article assumes a UniFi-managed network from end to end. If you’re already using UniFi, everything covered here will be available to you.
Part 1: Setting Up a Separate Wi-Fi Network and Isolating It
Creating a separate Wi-Fi network for children is the foundation of effective UniFi parental controls. This allows you to apply restrictions without affecting the rest of your home network.
For best results, complete this setup on a laptop or desktop computer, rather than a phone.

Step 1: Log in to Your UniFi Console
Open a web browser and log in to your UniFi console using one of the following methods:
- Visit https://unifi.ui.com and sign in to your account
- Or access the console directly using its local IP address
Once logged in, select your UniFi console from the dashboard.

Step 2: Create a New Network
- Go to Settings
- Select Networks
- Click Create New
Give the network a name. This name is only for your reference and will not be visible to users connecting to Wi-Fi.
You can customise the IPv4 settings, subnet, or VLAN if you already know what you want to use. If not, you can safely leave these set to Auto.
Scroll down and change the Advanced setting from Auto to Manual (this option appears below the VLAN ID).
Enable Isolate Network, then click Create.
You have now created an isolated network ready to begin the next stage of your UniFi Parental Controls.


Step 3: Create the Wi-Fi Network (SSID)
Next, you’ll create the Wi-Fi network that children will connect to.
- Go back to Settings
- Select WiFi
- Click Create New
Enter a Wi-Fi name (SSID). This is the name that will appear on devices, so choose something appropriate and easy to recognise.

Set a strong Wi-Fi password. Use a mix of:
- Uppercase and lowercase letters
- Numbers
- Special characters
Avoid obvious words or passwords your children might guess.
Under Network, change the selection from Native Network to the network you created in the previous step.
You can leave the remaining settings as they are for now.
Click Create to save.

Step 4: Test the Wi-Fi Network
After a short delay, the new Wi-Fi network will begin broadcasting.
On a phone, tablet, or laptop:
- Find the new Wi-Fi name
- Connect using the password you created
- Confirm that the connection works as expected
Once connected, any device using this Wi-Fi network will be isolated from your main network and ready for UniFi parental controls to be applied.
Part 2: Set Up the Content Filter
Now that you’ve created a separate Wi-Fi network, you can apply the first layer of protection using UniFi’s built-in content filtering.
This provides basic, network-level filtering and works across all devices connected to the children’s Wi-Fi network.
Step 1: Open the Content Filter Settings
In your Ubiquiti UniFi console:
- Go to Settings
- Select CyberSecure
- Click Content Filter at the top

Step 2: Create a New Content Filter
Click Create New and give the filter a name.
This name is for your reference only and won’t be visible to users.
Step 3: Optional – Enable Ad Blocking
If you want to reduce ads across websites and apps, you can enable Ad Blocker.
This is optional, but it can improve the browsing experience for children and reduce exposure to inappropriate advertising.
Step 4: Enable Safe Search
Below the ad blocking option, enable all available Safe Search options:
- Google SafeSearch
- Bing SafeSearch
- YouTube Restricted Mode
These settings help enforce safer search results, even if children try to disable SafeSearch within the app or browser.

Step 5: Choose the Filtering Level
Under Filtering, you’ll see three options:
- Off – No protection
- Enhanced – A subscription service from Ubiquiti
- Basic – Adult and malicious content filtering
Enhanced Filtering (Subscription)
Enhanced is Ubiquiti’s more advanced filtering service.
At the time of writing, this costs £79 per year.
You can use this if you want, but it is not required. In this guide, we’ll achieve similar UniFi parental controls without relying on the subscription.
Basic Filtering (Recommended)
If you don’t want to use Enhanced, select:
Basic – Adult and Malicious Filter
This applies UniFi’s built-in category-based filtering and blocks many adult and harmful websites automatically.
Step 6: Optional – Set a Schedule
If you don’t want the content filter active all the time, you can apply a schedule at the bottom of the page.
For most households, it’s best to leave this enabled at all times and handle access control using Wi-Fi schedules instead (covered later).
Step 7: Apply the Filter
Click Add to save and apply the content filter.
Your children’s network now has basic protection enabled.
Important: Understand the Limits
UniFi’s basic content filtering reduces exposure but does not block every inappropriate website. It relies on domain categorisation and does not inspect encrypted content in real time.
This is why, in the next step, we’ll strengthen the UniFi parental controls using family-safe DNS filtering.

DReam Machine Pro Max
- 8 x Gigabit
- 2 x 10Gbp
- 2 x HDD Bay

Cloud Gateway Max
- 5 x 2.5Gbp
- LCD Screen
- SSD Bay

Dream Router 7
- 10 Gbp WAN
- 4 x 2.5Gbp
- 1 x PoE
Part 3: Add Family-Safe DNS Filtering
UniFi’s built-in content filtering works well as a starting point, but you can strengthen protection by adding family-safe DNS filtering.
Cloudflare offers a free DNS service that blocks adult content and malicious domains at the DNS level, before websites even load. This makes it an excellent additional layer of protection for your Unifi Parental Controls.
Step 1: Open the Network Settings
In your UniFi console:
- Go to Settings
- Select Networks
- Click the network you created for your children
Step 2: Disable Automatic DNS
Scroll down to the DHCP Name Server or DNS section.
By default, this is set to Auto.
- Disable Auto DNS
- Change the setting to Manual
Step 3: Add Cloudflare Family DNS Servers
Enter the following DNS servers one at a time:
- 1.1.1.3
- 1.0.0.3
Click Add after entering each address.
These are Cloudflare’s family-safe DNS servers, which filter adult content and known malicious domains.

Step 4: Apply the Changes
Click Apply Changes to save the settings.
The network will briefly update while the new DNS settings take effect.
Step 5: Test the Results
Connect a phone, tablet, or laptop to the children’s Wi-Fi network and test the behaviour of the UniFi parental controls.
You should find that:
- Google search results are locked into SafeSearch
- Many adult websites are blocked automatically
This confirms that DNS filtering is working.
Important: Set Expectations
DNS filtering significantly improves protection, but it does not block everything. Some websites may still load, and certain apps may behave differently depending on how they access content.
If you want tighter control — for example blocking specific social media platforms or apps — UniFi allows this through traffic rules, which we’ll cover next.
Part 4: Blocking Applications and Websites with Traffic Rules
UniFi allows you to create custom traffic rules to block specific applications, services, or websites. You can create as many rules as you like, and they can be applied to individual networks, devices, or schedules.
This is where UniFi gives you much more control than most ISP routers.
Step 1: Open Traffic Rules
- Go to Settings
- Select Traffic & Firewall Rules
- Click Create New
Keep the rule type set to Simple, then give the rule a name.
This name is for your reference only.

Step 2: Set the Rule Action and Source
- Set Action to Block
- Under Source, select the children’s network you created earlier
- Click Save to confirm the source selection
This ensures the rule only affects devices connected to that Wi-Fi network.

Step 3: Choose What to Block (Apps or Websites)
Under Destination, you have several options.
In practice, App Groups are often unreliable, so for better results we’ll use App instead.
Blocking Apps and Services
- Select App
- Click Select
You’ll see a long list of apps and services. Unfortunately, these cannot be filtered by category, so you’ll need to:
- Scroll through the list
- Or use the search bar
Popular services like TikTok are easy to find.
For adult websites, you’ll usually need to search and add multiple entries manually.
You can select multiple apps or services within a single rule.
⚠️ Be cautious when blocking services you don’t recognise — some are shared by multiple platforms and may stop unrelated apps from working.
Step 4: Optional – Add a Schedule
As with content filtering, you can apply a schedule to the rule if you only want it active at certain times.
For most families, it’s easier to leave app blocking active all the time and use Wi-Fi schedules to manage access instead.
Step 5: Apply and Test the Rule
Click Add Rule to save.
Give the rule a minute or two to take effect, then test it on a device connected to the children’s Wi-Fi.
Blocked apps will usually:
- Partially load
- Then freeze or fail to connect
This confirms the rule is working.
You can repeat this process to create as many blocking rules as you need.

Blocking Specific Websites by Domain Name
If you want to block individual websites, you can use the Domain Name option instead of App.
This works, but it can be inconsistent:
- Some services use multiple domains
- Some load content from addresses you won’t easily see
As a result, domain-based blocking often requires trial and error and may not fully block larger platforms.
Part 5: Setting Wi-Fi Schedules and Device-Specific Cut-Off Times
Wi-Fi schedules are one of the most reliable parental controls in UniFi. They don’t rely on content filtering, apps, or categories — they simply control when internet access is available.
You can:
- Turn Wi-Fi off entirely at certain times
- Or block specific devices while leaving others online


Setting a Wi-Fi Schedule (Network-Wide)
- Go to Settings
- Select WiFi
- Click the children’s Wi-Fi network
Scroll to Advanced and change the setting from Automatic to Manual.
Scroll down and enable WiFi Blackout Schedule.
Use the calendar to set the times when the Wi-Fi should be OFF.
⚠️ Important: you are setting off times, not on times.
Once finished, click Apply Changes.
The schedule will now apply automatically.
Blocking Internet Access for Individual Devices
If you want to restrict one child’s device while allowing others to stay online, you can do this with a traffic rule.
- Go to Settings
- Select Traffic & Firewall Rules
- Click Create New
- Give the rule a name
- Set Action to Block
- Under Device or Network, select the specific device(s)
For Destination, select Internet, then apply the schedule you want to use.
Click Add Rule to save.
That device will now lose internet access according to the schedule you defined.

What Next?
In the final section, we’ll look at the weaknesses of these controls, including VPNs and mobile data — and the realistic ways to deal with them.
The Elephant in the Room: VPNs
A VPN (Virtual Private Network) uses encrypted tunnelling to route internet traffic outside your home network. VPNs are completely legal and very useful in many situations, offering privacy, security, and protection on public Wi-Fi.
However, when it comes to parental controls, VPNs present a major challenge.
Once a VPN is active, it effectively bypasses almost every restriction you have applied on your UniFi network. Content filtering, DNS filtering, and traffic rules no longer apply, because the traffic no longer appears as normal web activity.
VPN Blocking in UniFi: The Reality
UniFi does include tools designed to block VPN traffic, and you can create traffic rules to block known VPN apps or services.
In practice, I’ve found this approach to be largely ineffective.
VPN providers:
- Use constantly changing IP addresses
- Do not publish complete or up-to-date server lists
- Switch protocols automatically
- Are designed specifically to bypass simple network blocks
Even with VPN blocking rules in place, I was still able to connect successfully during testing.
This isn’t a fault with UniFi — it’s simply the reality of modern VPN services. Home networking equipment cannot reliably keep up with the way VPNs operate.

So What’s the Realistic Solution?
The most effective solution does not sit within UniFi at all.
The only reliable way to prevent VPN use is to control what apps can be installed on your child’s device.
This means:
- Managing app downloads on phones and tablets
- Removing or blocking known VPN apps
- Using device-level parental controls (iOS, Android, or third-party tools)
It’s frustrating, but it’s also the reality.
The good news is that most younger children:
- Don’t know what VPNs are
- Don’t actively look for ways around restrictions
For older or more technically minded children, network-level controls alone will never be enough. At that point, device controls and clear rules matter more than technical solutions.
Mobile Data: Another Unavoidable Limitation
UniFi can only control traffic while devices are connected to your Wi-Fi network.
As soon as a phone switches to mobile data, UniFi has no visibility or control at all. This works exactly the same way as a VPN — the traffic simply isn’t passing through your network.
This means:
- Wi-Fi controls stop working on mobile data
- Content filtering no longer applies
- Schedules and blocking rules are bypassed
How to Handle Mobile Data Safely
Most mobile networks allow you to enable adult content restrictions directly on the account. This is often free and applies at the carrier level.
You can also:
- Use built-in parental controls on the device
- Restrict app downloads and content ratings
- Combine network controls with device supervision
UniFi plays an important role at home, but it cannot replace device-level controls or mobile network restrictions.
Final Reality Check
No home network system can provide complete control on its own.
UniFi parental controls work best when combined with:
- A separate children’s Wi-Fi network
- Content filtering and family-safe DNS
- Wi-Fi schedules and device cut-off times
- Device-level parental controls
- Open conversations and clear expectations
Used together, these tools raise the barrier significantly — but they don’t eliminate the need for supervision.
Conclusion: What UniFi Parental Controls Do Best
UniFi parental controls offer a powerful way to manage internet access at home, but they work best when you understand what they can and can’t realistically do.
By using a separate children’s Wi-Fi network, applying family-safe filtering, adding DNS protection, and setting clear schedules, you can create a safer and more predictable online environment without installing software on every device. These network-level controls apply consistently across phones, tablets, laptops, games consoles, and smart TVs, which is where UniFi really stands out.
At the same time, no network-based solution is perfect. VPNs, mobile data, and determined workarounds will always exist, particularly as children get older and more technically confident. UniFi cannot replace device-level parental controls or mobile network restrictions, and it shouldn’t be expected to.
The most effective approach combines:
- Sensible network-level controls using UniFi
- Device-level restrictions on phones and tablets
- Age-appropriate rules and expectations
- Ongoing conversations about online behaviour
Used together, these measures raise the barrier significantly while keeping management practical for parents.
UniFi works best as part of a wider strategy — not as a single solution — and when set up with realistic expectations, it provides far more control and visibility than most consumer routers or ISP-supplied equipment.
Author: Huw Jones – Home Network Solutions Berkshire
Huw is a UniFi specialist and the owner of Home Network Solutions Berkshire, providing professional networking, CCTV, gate automation and smart home installations across the UK. With years of hands-on experience and a growing YouTube audience at @home.network.solutions, Huw creates practical, no-nonsense guides to help homeowners and installers get the best out of their UniFi systems.
Leave a Reply